Tuesday, March 13, 2012

A Backpacking Aficionado's 3 Season System, Part 2: Trip Report and Gear in Action

This is part two of a report on my new and improved 3 season backpacking system of gear with a base weight of 8.4lbs/3.8kg and clothing worn weight of 5lbs/2.3kg.  Here is part one, and here is a link to a detailed list of just about everything I might choose to take with me in the most challenging conditions (i.e. rain/snow and maximum low temperature of -4C/25F).  Same disclaimer as before: I am not sponsored and did not get any gear free from any company or anything like that.

My backpacking systems--which are: 3 season, winter, and summer--represent the culmination of many years of experience along with many hours planning, researching, and experimenting in hopes of making improvements to my systems.  An improvement in my system of gear translates into an overall improvement in my next adventure backpacking, and the more I go out into nature, it has been almost always a more positive and enjoyable experience as time goes on.  Sure, in the past I have made a lot of mistakes, but I have tried to learn from them, and as time goes on I seem to make less mistakes and things seem in general to be better.

For the second part of this report, I didn't want to just take pictures of all the rest of the junk I haul with me out there.  I thought it would be both more fun and useful to write a trip report, and highlight some of my favorite pieces of gear and how it works in the field.  So a few days ago I decided to go on a solo overnight trip in one of my favorite patches of woods about an hour outside of the city I live in.  

One of the great things about Sweden, if you love the outdoors, is that there is no shortage of beautiful geography to explore.  From a long coast line and many islands in the sea, to the vast stretches of woodland, a backpacker ought not to be bored living in Sweden.  And with only around 9 million people living here (much less than some big cities in the world like Mexico City and Tokyo), it's easy to share this large and gorgeous bounty as well.  On my trip I didn't hear or see anyone once I got deep in the woods, which is almost always the case.

The weather was excellent--low chance of rain, and about 8C/46F during the day and 0C/32F at night--which meant I could leave a few layers at home, making my base weight dip under the 8lb/3.6kg mark.  I left the windbreaker and my rain pants, but kept my rain jacket to use as a windbreaker, and there were some clouds in the forecast, in case of light rain.  No rain and lots of sun, so things worked out rather nice.  I also left my fishing kit, as the lakes are still (mostly) frozen over, and ice fishing isn't my thing anyhow even if the ice was safer.  Now on to lots of pictures!  Click on them to make them bigger, and that goes for the rest of my blog as well, in case you didn't know.

Here is a lovely little waterfall I crossed shortly after hopping off the bus.  I was full on water, otherwise this would be a great place to refill.  The creek is fed by a pond (still pretty frozen) close by that is somewhat isolated and itself is fed by a spring.

A view from a hill I climbed up after a few more hours of hiking.  Still frozen over, though pretty thin ice at this point, so I didn't risk walking across.

Down at the shores of the lake.  Note the cliffs in the distance.

A lot of the hiking I did on this trip (and most of my trips) is off-trail, AKA "bushwacking."  I decided to turn around and take a picture of an example of the thicker stretch of woods I was navigating through, and here is what bushwacking often looks like:

Here is a view of the woods I was hiking through from the top of a ridge I had just climbed.  I had to be a little more cautious here, as one time I camped out close to this spot, I ran into a boar.  I was able to scare it away, luckily, but now every time I move through here, that event is on my mind.

On top of the cliffs, facing the spot I was at earlier on the shore of the lake.

Another example of how thick it gets where I like to roll.

Finally, after getting down from the cliffs, an actual trail, and through a wonderful example of Swedish trollskog, no less.

Here I am a little deeper into the trollskog, almost time to find a nice spot to make camp.

This is the spot I settled on to make camp for the night.  It is on top of a hill near a lake.  The cold air will sink down, making higher elevations more desirable to sleep at, and if it were heavy rain, no chance of being flooded.  Being near a water source is always a plus too, not just to refill your bottles, but also to wash up and/or swim in too.

From another perspective, and with the tarp set up.

Dinner time.  My complete kitchen: collapsible plastic mug, cuben fiber food bag (with 3 meals, 2 snacks, sponge, plastic clip to attach to a rope to hang in a tree overnight), titanium long-handle spoon, alcohol fuel, matches, titanium Clikstand stove inside of titanium pot.  
While I also have a worth while DIY alcohol stove (made out of a cat food cat and tin foil windscreen, which I have written about in other posts) that is lighter weight (144g total for whole system), my Clikstand stove is overall my stove of choice.  The ease of use, excellent boil time (between 4:40 and 5 minutes for half a liter of cold water), and decent fuel efficiency (I use about 25ml of fuel each time and it is more than enough--on overnights I bring a 100ml bottle) all for only a total of 245g for the full system.  The DIY stove has a 6-7 minute boil time, plus uses more fuel, is fragile, and set up is a bit more involved.  Still not a bad choice, though, especially for the very low cost.  But if you want to go deluxe, this titanium beast is the way to go, and only a 101g weight penalty. 


Stove is set up and ready to go, and on the left is my meal (ramen noodles plus a pack of cup-o-creamy-chicken-soup to give it more substance) in a ziplock bag, waiting for boiling water.  Above my meal bag is my cozy bag.  After I pour the hot water into my meal bag, I seal it up and then put it inside of my cozy bag to stay warm.  My cozy bag only weighs 20g, and is just an envelope of space blanket I made myself (with duct tape) inside of a bigger ziplock bag.

I had heard of cooking in ziplock bags for a while, but was skeptical and just stuck to cooking in my pot and then washing it out afterwards.  Then I saw a video by Stick, another backpacking blogger, on youtube where he cooks and eats out of ziplocks with ease.  He made it look so easy I had to try it myself, and turns out it really is a great alternative to cooking out of your pot if you don't want to clean up.  Here is the end result, and it worked out great.  After 5 minutes inside my DIY cozy bag, I transferred my dinner to my pot to continue to keep it warm, and enjoyed an excellent backwoods meal pipping hot.  Helps to have a long handle spoon if you choose to eat like this.

After dinner I had tea and marveled at this view of sunset.

My shelter all set up, from before dinner, just to see how it looks up close.  The ground sheet is double layered, as I mentioned in part one of this report, to protect my inflatable sleeping mat.  My shelter even has a welcome mat, which is my back support of my backpack, and also my sit/kneel mat as well.  Very handy to have, plus in the morning it also acts as a place to put my socks and shoes on without getting dirty (or wet if it had rained).

Just before bedtime, what the inside of my tarp looks like.  Plenty of room for me (I am about 183cm/6ft and 83kg/183lbs) and all my gear in case it rains.  If it was windy and rainy, I could pitch the tarp lower to the ground, and location is also a big help.  You may have noticed above that I pitched my tarp right next to a log on one side, and a big pine tree on another side, which helps shield me from wind and/or rain.  If you are lucky or look hard enough, you can actually find natural shelters that are nearly wind and rain proof.  I have slept in a cave before and that was very cozy, but you can also sleep directly under a very big, thick, healthy pine tree and it's branches act pretty much as a tarp.

The morning, airing out my sleeping bag, just after a nice hot breakfast (oatmeal with berries, chopped almonds, and coconut) and cup of tea.

One last picture of a part of the trail going back towards civilization that I thought was very beautiful.  It's the kind of spot I would expect a hobbit or an elf to be smoking a pipe, seated there on that rock formation.

This was one of the best solo overnight trips I have ever been on, everything just seemed to fall in place and feel "just right."  All my new clothing and gear performed equal to or exceeded my expectations, for example this whole new realm of ziplock bag and DIY cozy cooking.  My running pants, which I was a bit concerned about their durability, pleasantly surprised me.  Not only did they take no damage from the harsh bushwacking that I do, brush and branches seem to slide off of them better than my regular hiking pants or jeans.  

I didn't feel like taking pictures of my new water filter (kinda boring), but that also worked great and saves lots of time.  In my youth I relied on iodine pills, which work fine, but had to be bought and replaced, plus gave water a funny taste.  Then for many years I just boiled all my water to purify it, if needed.  Economical and reliable, sure, but takes time and energy.  So last year I finally broke down and got a great little filter to suit my needs, and only weighs about 100g for the filter itself plus a folding plastic flask that's about a liter in volume.  Water here in Sweden is very clean, and if you are careful you don't have to treat your water at all and just drink it straight up.  But sometimes if I am thirsty and there is questionable water around, say a big puddle, rather than get a fire going and boiling it, in less than a minute I have potable water.

In total I hiked about 13km on my first day in, about 8km the next day coming back out, and enjoyed every step pretty much.  I could have easily hiked further, but time constraints (school) prevented me from doing so.  Looking forward to more trips like this, and to summer where I will switch over to my summertime backpacking system, which is even lighter and minimal.  


I am even strongly considering doing a XUL overnight trip, which is the very limit of the entire school of lightweight backpacking.  My summer base weight will be under 5lbs/2.3kg, which is considered SUL (super ultralight) backpacking.  XUL is 5lbs/2.3kg of weight for your base weight and clothing worn combined.  If I do go for it, I will be sure to write up a full report here.

*EDIT: I did end up doing a XUL trip!  You can read about it here. :)

I hope you liked my trip report and part two of my 3 season system report, and as always I encourage feedback, either below in a comment, or in an email.  Thanks for reading, and get out there and take a trip of your own and soon!

Wednesday, March 7, 2012

A Backpacking Aficionado's 3 Season System, Part 1: Clothing and The Big Three

An aficionado is, to paraphrase Hemingway, one who has passion.  


Before I begin to breakdown in detail my entire 3 season backpacking system, I would note a few things for context.  I don't play any musical instruments, as many of my friends do, and hence own no guitars or drum kits or amplifiers.  I don't care really care about cars, other than to get my family and I and our stuff from one place to another.  As such, I own a 7 year old station wagon that we bought used.  I not only don't care about fashionable clothing, I harbor a certain degree of antipathy towards the fashion industry and people who are devoted to constantly buying trendy, expensive clothing.  


I honestly don't do all that much, and live a simple and happy life most of the time (or try to at least).  When I am not focused on my family, I am focused on my post-graduate studies, and whatever time is left over after that I like to backpack as much as reasonably possible.


Thus, I spend the majority of my free time and money on going out into the woods, which I deeply love; and to go there for extended periods of time and distance, I have endeavored to master the art and science of backpacking.  So yes, some of my gear (which is of high quality) might be a bit expensive to some, but as I have observed here on this blog in the past, backpacking compared to other outdoor hobbies can often be much cheaper--for example, next to kayaking, nature photography, hunting, skiing, etc.  If you are looking to save money but still get good gear, I wrote a whole other post about backpacking on a budget.


The style of backpacking that has served me best and allowed me to have the greatest amount of pleasure out of the experience of being in nature has been ultralight backpacking, which if you have been reading my blog at all you already know, if not check out the archives (or Wikipedia) for more information.  My backpacking system has changed a lot over time, quite drastically if you were to compare it my system a decade ago.  But even now, maybe once a month or season, I will learn a new trick from myself or others to improve my system.  What follows is the most current version of my backpacking system, and therefore what I consider at the moment to be "best" for my wants and needs for 3 season use.


What is 3 season use?  Depends on who you ask and where they live, and as of now even Wikipedia has nothing to define it.  My own personal 3 season is from roughly March to November, meaning I could use this gear list anytime during these seasons.  However for summer time (June to August) and winter (December to February) I have different, more specialized systems, which is why I will often call this my "spring and fall list."


The total weight of literally everything I bring with me (full skin out): 8045g (17.7lbs)


Weight of clothing worn: 2299g (5.06lbs)
Base pack weight (no food, water, fuel): 3806g (8.37lbs)


Click here to see a detailed report from the wonderful geargrams website.


Now keep in mind that this gear list, like any gear list, makes some assumptions.  For one, it includes rations for just 1 day (3 meals and 2 snacks), and 1 day of fuel (though if conditions are right, I can always opt to use a campfire).  The above list is more or less the complete list for the most challenging conditions normally present in the earliest and latest parts of the seasons in question, which means rain and/or snow in chilly early March or late November.  Taking this entire gear system, I would feel comfortable going out in nearly any weather (I am not going to risk my life in a storm if I can help it) down to low temperatures of around -4C (25F).  When it is warmer, or say if there is very little or no chance of rain, then I can leave some layers at home, of course.  So this represents the heaviest possible combination, and is by no means a static list.


I very recently updated my clothing system, and made sure to go out and test it to ensure it worked properly.  The test was pretty straight forward, on a chilly night of -3.6C I went out on a long walk, then came back and sat in my backyard with my night layers for awhile to simulate sitting around camp.  I was warm and comfy during both experiments, and only shivered for the first few minutes going out into the cold at the beginning.  With this new system of clothing, I was able to shave nearly a whopping kilo (2.2lbs) of weight of clothing worn compared to my old system.  Efficient warmth does not have to mean thicker, heavier clothing!


Here are some pictures of all the clothing and some reasoning behind my choices.
Wool socks, 88g.  I could go lighter here with shorter synthetic socks, but don't feel like it is worth it.  These are very warm and comfy socks, for one, plus I find that synthetic socks tend to get smellier and get smelly faster.


Cotton underwear, 92g.  Again, could go lighter here, but this is good enough. This is the only piece of cotton clothing I take with me now.  Like socks, I found that synthetic underwear gets stinky, and not as breathable for a part of my body I'd like to be very breathable.  These boxer briefs also double as my swimwear if I want to take a dip, and dry easy either hanging off my pack or near a campfire.  I don't mind going commando, though with the base layer bottoms, it's not as big a deal anyhow.


Merino wool base layer pants, 196g.  Very warm and comfy, worth the small amount of weight over synthetic bottoms, and for some odd reason I don't find bottoms as itchy as tops.  Maybe because I have very hairy legs?


Synthetic base later top, 175g.  I also have a merino wool top, but after trying both on, I found the synthetic one to be more comfortable.  Wool, even merino wool, can be a bit itchy, though it is warmer.


Mexico football jersey, synthetic, 135g.  I wear this over my base layer, or if it is warmer out I can leave the base layer top at home and use the jersey as my base layer.
Synthetic running pants, 155g.  I am a bit concerned about how durable these will be for my needs, as I am at times literally crawling and climbing around rough stretches of nature.  But very light, comfy, and cheap.


Synthetic sweater, 265g.  I'd like to switch this out for a down-feather sweater, which are warmer, lighter, less bulky, and very comfy--but very expensive.  Until then, this is a decent layer, especially for the low price you can pick one of these up for.  This would be the first thing I would leave at home if it was not as cold out.


Windbreaker, 207g.  Very comfy, and my most "stylish" piece of backpacking clothing, even though I got it for very cheap at a clearance sale.
Rain pants, *0g (165g, but noted in my base pack weight, not my clothing worn, as I usually don't wear this unless it's raining/snowing).


Glove liners, synthetic, 35g.


Leather gloves, 105g.  Could go lighter here, but these gloves have not only good warmth value, but also good utility value, e.g. protecting hands while collecting/breaking up firewood, and pot holder.


Rain jacket, waterproof/breathable, *0g (380g in base weight).  I can put this on over everything for a solid amount of added warmth.


Merino wool scarf/buff, 55g.  One of my favorite accessories, can also be used as a balaclava. 


Baseball hat, 77g.  My least "stylish" piece of clothing with redneck camo, but I love it, good buddy.
Synthetic vest, *0g (210g in base weight).  This is worn at night when it is colder, or as an emergency layer if there is a sudden change in the weather and it is windier/colder than expected.


Synthetic socks, *0g (26g in base weight).  For sleeping, or if my hiking socks get wet, a spare pair of socks.


Synthetic beanie, *0g (50g in base weight).  For nighttime and sleeping.


Not pictured are my shoes, which are a pair of New Balance tough trail running sneakers, which come in at 714g.


And there you have my new and improved 3 season full clothing worn.  Now on to my choices for the big three: backpack, shelter, sleep system.  I should also note that I am by no means sponsored or paid by any of the companies below, nor have I received any free gear for review purposes.


After trying many backpacks out over the years (my go-to backpack for years in my youth was an old army issue ALICE pack), I have finally settled on my favorite for my 3 season requirements.  It is the Mountain Laurel Design Exodus 50 liter frameless pack, and mine comes out at 445g without any shock cord or pockets.

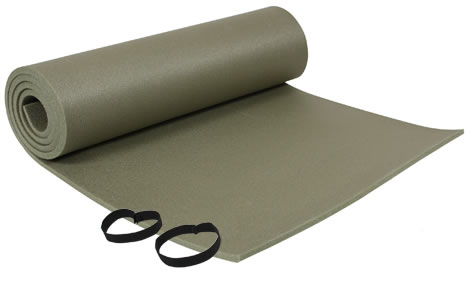
I use a big rectangular strip of generic foam mat as back support, which only adds 40g of weight, and when I get to camp the foam strip acts as my sit/kneel pad.  I was also able to buy this great pack used from a backpacking website for nearly 100 bucks less total than brand new, which goes to show you that you can save money and win out on used gear.


Next, my shelter of choice, the amazing Zpacks Hexamid solo tarp:
At its longest and widest, it is 2.7m x 1.3m (9ft x 4.5ft), and when it is all folded up it can fit into a one liter stuff sack.  With guy lines, titanium tent stakes, and stuff sack the total weight for this shelter is a mere 180g.  To finish off my shelter, I made a ground cover out of a garbage bag and space blanket that only weighs 85g.  I opted to go for a tougher double-layer ground cover to give added protection (and a tiny amount of added warmth) to my sleeping mat, which is often inflatable.


Which brings us to sleep system.  I'll start with the mat, as I just mentioned it.  It is the brand new 2012 Therm-a-Rest Neoair Xlite.  With an R rating of 3.2 and a weight of 360g, this sleep mat is hard to beat.  Very comfy, and not slippery either, a common issue with sleep mats.


For my sleeping bag, I opted for the warmth and light weight of a down feather bag.  After buying my first, mid-rage down bag last year, I was very happy with it and wanted to go deluxe and spoil myself a bit.  I say if you are going to spurge anyplace on your gear, it's your sleep system.  Behold, the most awesome sleeping bag I have ever used, the Marmot Plasma 30.

I love pretty much everything about this bag, from the weight of 645g for a temperature rating of 0C, to the colors, to the build in draft collar inside the bag to keep you extra warm and cozy inside.  I don't like the price, but lucky for me, this was a X-mass gift from my dear old mama.  Thanks again mama!  So if you are crazy about backpacking and can hold out until your birthday and holidays, sometimes your family can jump in and hook you up.  Just be sure to try and hook them up too, as best as you can.  Many parents are happy with a hug and more time spent with them.


Well there you have it, a complete run down of my clothing and my big three for this gear list.  You can read part two of this breakdown here, where I go into even more detail, plus you can see the gear in action.  

Looking forward to enjoying yet another year of stomping around the woods with a new and much improved gear system.  Good luck finding the right set of gear for you, and remember that this can and will change ;).

Thursday, February 16, 2012

Winter Backpacking

Often when I tell people that I am going to spend the night in the woods when it is the middle of a cold, snowy winter, I get surprised reactions.  Some people are shocked at the prospect of sleeping outdoors in the winter and/or below freezing, and some have even doubted that it's possible to have a good time or be comfortable.  But seriously, I would not go out there if it wasn't both fun and safe!  Nor would plenty of other devoted backpackers that also go out in cold weather conditions.  I just got back from an excellent trip last weekend, where there was some light snow, and temperatures of around -3C overnight.  


I went out in January as well, when it was -5C, and in the past I have slept out as far as about -15C overnight and -8C during the day.  My personal limit would be anything past -20C, not because I don't think it would be fun and/or safe, but because I don't have the funds to buy more extreme-cold weather gear.  Nor do I plan on buying extreme-cold weather gear, as this is an expensive investment for only a very small part of the year--and where I live, it is very rare that it drops below -20C even in the coldest part of winter.


So up to my personal limit of -20C, what I'll do is answer some frequently asked questions people have posed to me about the season that is often neglected, even by those that enjoy backpacking in the other 3 seasons.  I seem to have been asked more questions the past few months due to going out more this winter, and with more members joining my camping club at school.  


If you plan on backpacking in temperatures lower than -20C, I suggest you make sure to do your homework and research, prepare, and plan as much as possible.  You might want to read a few books covering more advanced winter camping, or go to camping forums and ask around for more advanced tips.  The colder it is out, the more consideration you must take on your trips outside, especially if you are going to be sleeping out there!


Here we go, and if there are any other questions you'd like answered, just email me and I would be happy to add it to this post.  There are lots of great articles out there that I will link in my answers for more details and information.


----------


Q: You're going out into the woods and sleeping in the middle of winter?!  Are you crazy!?


A:  Yes.  No.


Q: You're going to freeze to death!

A: No I'm not.  Shut up.  That's not even a question.


Q: What kind of clothing should I wear to go winter hiking/backpacking/camping?


A: Avoid cotton, first of all.  Synthetic fibers like polyester work well, as does wool.  Down feather clothing is ideal, but expensive.


Q: How do I layer clothing?


A: First a disclaimer: Everyone has different reactions to the cold.  Some people have high metabolisms or tolerance or for whatever reason can deal with the cold easier than others.  I will explain what works for me (and I tend to deal with the cold better than some).


Depends how cold it is, and how much you are moving.  Your upper body/torso is more important to keep insulated, because that is where your vital organs are.  I have found that I am comfortable around 0C with three (upper or torso) layers, down to -5C with four layers, and down to -10C with five layers.  Past -10C I will substitute certain thin layers with thicker, warmer ones to get down further.  If I am hiking or doing something active, I will simply remove a layer or two.


An example of what I use for when I have five torso layers are:  polyester long sleeve shirt, wool sweater, polyester fleece jacket, synthetic vest, water resistant jacket.  I will switch the jacket for a thicker winter overcoat if it dips below -10C.


For my lower body: polyester long tights, nylon hiking pants, and wool socks are usually all I need.  If it gets below -10C, I will also wear snow pants over my hiking pants.


First layer you wear is called a base layer.  These are often polyester or wool tights, wool (especially merino wool) being warmer but much more expensive.  Next you have your mid-layers, or insulating layers, such as a sweater, vest, or jacket.  There are lots of different kinds of combinations and types of insulating layers, and the price can range quite a bit.  A synthetic vest can be quite cheap, versus a high-end down-feather vest which can cost more than some people's entire backpack full of gear.  


The last layer is called the shell layer or outer layer.  This ought to be at least water resistant, if not water-proof.  High-end shell jackets that are water-proof and breathable can cost quite a bit, but there are lots of affordable water resistant jackets and coats.  You can also buy water-proofing sprays and waxes for your outer layer.  It should go without saying to have gloves (maybe even two pair), hat, and scarf.


Here is a good video on how to layer from an ultra-light perspective, though this system is not intended to be used too much further past freezing, as stated in the video, without some adjustments.


There are people that also use vapor barrier clothing to keep warm, but after a few experiments with it, I found it generally too uncomfortable for me, but here is a good (and long and very detailed) article about it.  It should be noted that some people, like the author (a professional who has backpacked around Alaska in VERY cold weather for months), swear by VB for being effective and good for saving weight on clothing.  


Q: Holy crap, good winter sleeping bags can cost a lot of money!  Any alternatives?


A: Yup.  Many backpackers have a summertime sleeping bag and a 3-season bag, or a few different kinds of sleeping bags, or maybe your boyfriend/girlfriend/mom/dad/etc. has an extra sleeping bag laying around.  Simply use two sleeping bags.  I have found that using my down feather 3-season bag inside of my wife's 3-season synthetic bag works great.  Just make sure to test out using both bags at home to see if they will work together, and it's also a good idea to take them outside (or maybe on your balcony if you live in an apartment) and see now they handle the cold.


Q: Good ground insulation (i.e. sleeping mats) can also cost a lot of money!  How about an easy fix for that?


A: No problem.  Again, most backpackers have a summertime mat and 3-season sleep mat, especially because of the low cost of foam mats.  Like the sleeping bags, you can use them both.  R value (a number given to how well something like sleeping mats insulates you from the ground and keeps you warm) stacks--for example, a summer mat has an R value of about 1 usually, and a 3-season mat has an R value of 2-3, so used together you have an R value of 3-4.  


Only have one sleeping mat?  Well, this ought to be a 3 season mat, so just buy a cheap foam mat to go with it, and now you have a mat for the summer too.  Also remember that you can use other gear to put under you for insulation too, like your backpack, sit pads, etc.  And you can also use natural material like dead grass/reeds and/or pine branches too, but please respect nature!


Q: I get cold so easy when I sleep!  Any other tips on how to keep warm?


A: Sure.  Sleep with all your layers on at night, and use everything you can put under you for insulation (see above).  


Take a space blanket with you (here in Sweden they only cost 30 SEK at Jula or Clas Ohlson) to use as either a vapor barrier inside of your sleeping bag, or a heat reflector on top of your sleeping bag.  If you use it on top of your sleeping bag, make sure to place it lightly on top of you, or hang it next to you (say on the wall of the shelter you are sleeping in, e.g. the side of your tent) so condensation does not gather on it and get you wet.  


Wear a different pair of sleeping socks to bed (or two pair of socks), along with gloves and a scarf.


Another good trick is to eat a rich late-night snack to make sure your body has enough energy to keep itself warm that is readily available, like a bar of chocolate or some salami and cheese.


You might want to consider buying a higher quality sleeping mat with a R value of 4-6 if you are a cold sleeper for winter camping.  There are even mats with down feathers in them that go up to as high as R value 9-10, but they ain't cheap or lightweight.


Q: How do I keep my water from freezing, and how do I gather more water?


A: Put your water bottle in your pocket or inside your jacket while you are walking, and/or inside your sleeping bag at night.  


To gather more water, find clean, untouched snow and fill your bottle, then put it in your pocket/jacket to melt.  Or you can melt the snow over a fire or stove.  While it might be hard to gather water from a lake that is frozen solid, you can break pieces of ice to melt with a rock or strong stick.  Or find moving water, like a stream--and many lakes have streams that feed them, just check your map.


Q: When is it safe to walk across a lake?


A: There is no easy answer for this to cover all situations, but if it has been below zero and stayed below zero for several weeks, the entire lake looks frozen, and the ice does not break after carefully testing it, it's usually safe.  Note: usually.  


There are many factors in how safe ice is to walk on, and as a general rule, there is no such thing as 100% safe ice to walk on because of this.  So use common sense, make as many observations of the environment as possible, talk to locals if possible, and test the ice first with some rocks or logs.  


Always carry your knife or keys where you can get to them quickly in case the ice breaks, so that you can use these as tools to pull yourself out of the ice.

Here is more information on the subject that is worth looking into if you want to hike or camp in the winter, especially if there are a lot of lakes in your area, like there are here in Sweden.


----------

Those are all of the questions I got recently off the top of my head.  I hope this helps some one to go out and enjoy the many wonderful aspects of winter camping.  No bugs, less people out, the beauty of snow and ice, and not to mention how fun snow and ice can be.  On our trip we cleared a spot of solid lake ice and had lots of fun and laughs running and sliding to see how far we could slide, not just on our feet, but on our bellies and backs and butts too.  Our club's next trip we will go sledding, if possible.  


Don't let the cold intimidate you!  With a little extra planning a whole new and exciting kind of backpacking awaits.

Sunday, January 29, 2012

Backpacking on a Budget

Several fellow students have asked me for advice on how to go backpacking or camping economically.  I even got an email from some high school students that have heard of GUCK (my university's camping club that I founded/co-organize), and they asked me about this as well.  In short, it can be cheaper to buy a decent set of backpacking gear than it is for your average student pub crawl on a typical Friday night, as you will soon see.


This will be a guide to putting together a cheap and effective set of backpacking gear.  When you compare backpacking--even if you include band new, high-tech, ultra-light gear--to other outdoor activities (e.g. canoeing/kayaking, skiing/snowboarding, fly fishing, mountain climbing, etc.), it can be a relatively inexpensive hobby.  Once you get a solid set of gear, you don't have to buy anything else unless you need to replace something if it breaks or gets damaged, it should also be noted. There are no memberships or dues to pay, and you can do it all on your own.


So let's get started: the big three.


The big three in backpacking are the backpack, sleep system, and shelter.  I would say that the backpack and shelter are the easiest of the two to take care of, as well as the cheapest.  If there is any part of your gear that you should also spend a little extra money on, I would definitely say it's your sleep system.  But first let's knock out the two easy fixes.


One I have already written about in another post last year, so just check that out.  The short of it is that you can make a decent, wind and waterproof shelter out of cheap plastic sheeting and/or garbage bags.  Perhaps the cheapest and easiest solution you will find for any backpacking gear.


Now on to backpacks, a slightly more complicated gear choice.  Before anything, make sure to do your homework on what kind of backpack would be best for you.  How much volume, how much does it weigh, how much weight can it comfortably carry should all be taken into account before your quest begins.  For three season use, I happen to prefer backpacks that are around 40-50 liters of volume, are less than 1kg in weight, and can hold up to 10-15kg without issue.  In the summertime, however, I tend to take less weight and bulk, so a pack that is 20-30 liters, less than 500g, and can hold up to 8-9kg works great for me.


For the would-be backpacker with low funds, there are three solutions:


1.  Buy El Cheapo made-in-China special at your local department store (e.g. Walmart and K-mart in the USA, Jula and Clas Ohlsson here in Sweden).


2.  Buy a decent pack used, best bet being online (ebay, blocket, etc.), but if you are lucky and/or look hard, you can find one at 2nd hand stores or yard sales too.


3.  Make your own backpack, DIY baby!


Choice 1 is a gamble.  I have bought several of these kinds of bags in the past for very cheap, and some of them I had for years with little or no issues.  I have one that I use as my urban backpack (books, groceries, etc.) quite regularly that I have had for about 7 or 8 years and it is still going strong.  I paid 25 USD for it at an army base.  Then again, I bought my wife a different one several years ago here in Sweden and it broke down after about a year of occasional use, and only 3 or 4 normal backpacking trips.


Choice 2 is a safe bet, but takes more time and research.  It's best to read reviews, ask the seller questions (how many nights out has it been used total, for example), and shop around.  I recently, through a backpacking website's forum, got a pack that new would have cost me about 235 USD with shipping, for 135 USD with shipping.  There are good deals out there if you are patient or lucky.


Choice 3 is also a safe bet, but you have to work, of course.  It also calls for either you or someone that can help you to know how to use a sewing machine.  Last year I wanted an ultra-light backpack but lacked the funds, so I made my own with a simple idea in mind.  I bought a cheap Duffel bag from IKEA, cut a back of a ski bag off that I got as a gift (I don't ski, so not sure why this family member thought this was a good gift, but turned out to be put to good use), and then had my wife sew the two together for a surprisingly decent bag.  I would take my DIY bag below over plenty of fancy, expensive packs you find at specialty camping stores, and have taken it out on plenty of trips into the woods.


Before

After, packed with gear

Wearing it for the first time, it has since been modified for some slight improvements.  Note the basic hip straps.

Inside loaded with gear, easy to access opening, and the total weight of the bag is only 450g.


Almost done with the big three!  Now it's the sleeping system to take care of, perhaps the single most complicated and diverse gear choices in backpacking.  If you don't know the basics, I wrote a good deal on it in another post.  


Let's first cover sleeping mats, which should be the cheaper and easier part of the system to cover.  For the broke backpacker, you are pretty much limited to foam pads and bulkier, heavier versions of both self-inflating and inflatable mats.  In warmer temperatures, and when most broke backpackers like students go camping i.e. summer time, all you need is a foam pad.  


A lot of really good things can be said about foam pads, though, so don't worry.  They are lightweight, provide not-bad insulation and comfort, and are tough and can't deflate even if they do get damaged.  You can also use it in combination with another sleeping mat for more insulation when it is really cold out.  But if it is cooler out, or if you find foam pads uncomfortable, you are going to want something with air in it, which makes it both warmer (higher R value) and softer.  Here in Sweden I have seen generic self-inflating sleep mats for as low as 200 SEK (28 USD), which is not so bad.


There is also the option of buying used, but make sure to be careful on this one!  You don't want to buy a defective, leaky mat and then not be able to get your money back.  A defective backpack you can spot easier, and fix easier as well, by contrast.


Next is often the wallet breaker in the world of backpacking: a good sleeping bag.  Again, if you don't know much about them, read the article I wrote that is linked above before you even think about buying anything.  Down feather sleeping bags are going to be more expensive, so unless you buy used, the broke backpacker is stuck with synthetic sleeping bags.  This ain't so bad, nor should it prevent you from getting out there and camping.  But synthetic bags are nearly always heavier and bulkier.  They can be pretty cheap, at least, and I have seen sales here in Sweden for bags as low as 100 SEK (14 USD).


After you buy a sleeping bag, it's a good idea (especially if it's of questionable quality) to test it out before you go out and adventure with it.  Ratings are hard to measure, and are often even harder to measure with mass-produced generic products from companies that just want you to buy it, so they will bump the temperature ratings up to make it seem like a better deal than it really might be.  If you test your bag outside (like in your backyard) and you are even slightly cold with it, it's probably going to be worse out in the woods.  Either get a better bag or take extra layers like a thick wool sweater and/or socks to make up for it.


So there!  The big three is out of the way.  If done right, here in Sweden you really could take care of the big three with as little as say 550 SEK (78 USD) total; with 250 spent on backpack (or materials to make one), 250 spent on a synthetic bag on sale plus a foam pad, and 50 on a roll of duct tape, garbage bags, and some rope for your DIY shelter.


The rest is detail work, filling in the gaps of what your preferences are when you go backpacking.  Here are some important examples one ought to take care of, but of course there is plenty more you may want or need to take:


A first aid kit is an easy fix, they have pre-made ones for sale at many different stores and even supermarkets, and should always be accounted for.  You can also put together your own.  Here is mine:


This covers many first aid and safety concerns, is only about 100g, and cost little.


Cooking, many people forgot, is actually optional.  You don't have to take a stove or pots, and just eat non-cook foods or foods you can grill over a campfire with sticks.  If you want or need (if it is raining or no wood around for a fire) a stove, then get a cheap pot/tea kettle (camping store has cheap little aluminum ones, or 2nd hand store), and then make your own stove out of a can of cat food.  Below is a picture of my cat food can stove, windscreen, and small tin pan (heat reflector/ground protector/primer).  


It only weighs about 30g total for all three parts, and works pretty damn good.  Here is a video how to make the stove, and here is one on how to make a wind screen for your stove.  


A good knife I would highly recommend, though there are some ultra-light zealots that insist that a razor blade is all you need.  A Mora knife is very cheap and of surprisingly good quality for the price, about 30-200 SEK depending on the model.  


A compass can be easily found for 50-100 SEK at camping stores, or for free on your fancy telephone if you have one (don't run out of batteries and get lost, though).  Maps can be downloaded from the internet for free and printed for cheap most of the time.  To waterproof a map, just buy a roll of clear tape and tape it up.  


Rain gear is also easy to find and cheap.  A rain poncho can also double as your backpack rain cover by wearing it over both you and your pack.


You never have to buy a water bottle.  Take some plastic bottles out of your recycling bin, clean them out, and there you go.  My current favorite are Imsdal bottles, which cost 15 SEK (plus you get nice Norwegian spring water) for 700ml and only 30g in weight.


Most of all with the rest of the details and filling gaps in your gear, it is best to just get out there and learn by doing.  If you go on your own, take notes while you are out there on what could be brought with you next time or how to change things or a good improvisation you came up with.  If you go with others, ask lots of questions about how they do things, you will be surprised what you will find out about how other people do things while backpacking.  So go out and get yourself a set of good, cheap gear, try it out, have fun, and in the mean time you can always save up money for nicer replacement gear and/or backpacking luxuries.


In the future I will go over my current ultra-light set up.  It wasn't cheap, though it was not that expensive either, when considering other interests--like say high end fashion and stylish, band name clothing, of which I own none (I am a cheap jeans and t-shirt kind of guy).  But backpacking and camping is what I am passionate about.  It's my thing, and I love it and take it seriously.  So once you get out there and put in night after night out in the woods, every season, maybe even every month of the year, then things start getting serious and you want serious gear to deal with it better, faster, lighter, stronger, etc.  


So for the more devoted backpacker, or to see what a devoted backpacker's gear looks like, you can read a complete breakdown of what are my current "best" gear solutions I could put together for my wants and needs.

Friday, January 27, 2012

Long Break and Answering One Important Question

Okay, so it has been a long time (half a year!) since I have posted a blog.  At least I have good excuses with a new baby, graduate school, and family drama and such.  And then of course there is my camping club GUCK and actually getting out into the woods!  Just went last weekend to a lovely spot I never camped at before with my club, and it was amazing.  A few friends made some requests for blog articles quite some time ago, and I finally will get around to them sometime soon (a week or so).  Just thought I would get this obligatory disclaimer out of the way first before jumping back into things.

The topics for the next three blogs I have planned will be:

1.  A Guide to Buying/Building a Very Cheap, Effective, and Comfortable Set of 3-Season Backpacking Gear

2.  A Guide to a Serious/Passionate Ultra-Light Backpacker's 3-Season Backpacking Gear

3.  A General Guide to Winter Backpacking (Temperatures Below Freezing)


Now however, I want to answer one very important question a friend and professional philosopher asked me that I think I can answer somewhat quickly.  Joakim asked me what the best things to talk around the campfire are with friends.

I really enjoy discussing politics and religion, but some people are a bit sensitive about these subjects.  One fun and easy question I like to ask people is what they would do with a million Euros as an icebreaker if camping with people I don't know as well.  Mafia is also a fun game, but it requires a larger group.  But once I get to know people a bit more, I like to play a little game I call the "what if" game, and can be played with only two people.  With close friends, this game can get really crazy and hilarious, I might add, because of details that intimate relationships offer that can be used in game.

It's a pretty simple concept, you have to pick between two choices.  They can either be pleasant or unpleasant choices, but I have found the trend is to stick with more unpleasant choices for some odd reason.  I think it is because this produces funnier reactions from people.  To make the game more concrete, and to keep people from sneaking out of a given "what if" choice, here is a hypothetical I like to use:

Imagine you are kidnapped by a crazy billionaire.  This rich person for whatever insane reason wants to present you with two choices and you must pick one of them.  You simply must answer the question, or else the crazy billionaire will will make not only you suffer, but all of your family and friends and even your pets.  You can't run away, you can't resist, you can't kill yourself, all you can do is tell the crazy billionaire which of the two choices presented you would prefer.

An mild example of a pleasant "what if" is to pick between a fancy sports car or a yacht as a gift, both worth about 1 million Euros brand new.  This of course begs other questions afterwards, like would you keep the gift or sell it, and if so, which would be easier to sell?

A mild example of an unpleasant "what if" is to pick between being permanently blind or deaf, and why.

You go around in a circle at the campfire and let everyone come up with their own set of choices and everyone must answer.  An optional rule is that if everyone agrees on a choice, that choice is retired, and another one is set up against the choice that no one picked.  For example, if everyone chooses to be deaf rather than be blind, the next choice could then be say, between being permanently blind or to lose both your legs from the knee down.

It makes for an interesting game, and some pretty unique and funny choices and reactions to these choices inevitably come up.

Hope this answers your question, Joakim.  I will hopefully have another post up soon to answer my friend Nico's question on how to camp for cheap.