I have made many gear lists in the past few years. I find it really helps to organize your gear, encourages you to evaluate each choice of gear critically (i.e. weight and utility), and discourages you from forgetting anything important. I recently sat down and made an updated version of my summertime gear list. This gear list is under 10lbs, which is generally considered to be ultralight. I will soon be going on vacation to Spain with my family, but when I get back I can't wait to test it out. I also plan on testing out a super-ultralight (base weight of gear under 5lbs) set of gear, something I have never done before, just to see how it goes.
Here she blows:
Cesar’s Overnight Gear List Summer 2011
Gear
Weight (g)
Notes
Backpack
840
Golite Jam
Sleep system
830
Synthetic warm weather sleeping bag, polyester sweater, beanie, socks
Shelter
1035
Big Agnes FCUL1
Ground cover
215
Homemade
Personal survival kit
222
Crank flashlight, string, whistle, firesteel, space blanket, candle, pen, paper, duct tape
First aid kit
152
Gauze roll, gauze pad, safety pins, 3 doses Tylenol, band-aids, butterfly strips, tape, latex gloves, alcohol pads, tweezers, sewing kit, mini-Bic lighter, tissues
Mess kit
141
Titanium pot (700ml), tin foil lid, plastic mug, plastic spoon, sponge
Knife/sheath
143
Mora Bushcraft Forest
Water bottles (2)
42
1.5 liters total volume
Compass/mirror
79
Garbage bag
77
Rope
30
Rain Poncho
220
This stays in the car if there is little/no chance of rain
Hygiene kit
132
Towel, biodegradable soap, toothbrush, toothpaste, lip balm
TOTAL BASE WEIGHT
4158 grams
9.15 pounds
Food bag
575
3 meals, 2 snacks
Water
1500
Boil more to sanitize if needed
TOTAL BACKPACK WEIGHT
6223 grams
13.70 pounds

Saturday, June 25, 2011
Thursday, June 23, 2011
The Importance of Location
In general, there are some pragmatic options to keep in mind when you pick a campsite, but of course there is a subjective element at play with every camper having certain preferences about where they choose to make camp. So rather than just list off some static examples of what makes a "good" campsite (water source, solid ground, nice views, etc.), I thought it would be more useful and interesting to examine some real campsites from a few trips I recently went on.
I have been camping and exploring a very remote part of Sweden near the boarder of Norway for several years now. I have really fallen in love with a huge patch of challenging, raw, beautiful, isolated woods. Much of this patch is even doesn't even have any trails or roads, but on occasion there are some old logging paths and dirt backroads that are helpful in navigation and cutting through or around more unpleasant patches, like swamp and impassible cliffs. I named this whole area the Bråten (Swedish for rubble or ruins) woods, after discovering a ruined old cottage out there on my first camping trip there.
Last month I spent a few nights in Bråten woods with some bushcraft buddies I met through a website, and this past weekend I spent the whole weekend there as well, but this time with members of the camping club I founded and run called GUCK. Both trips were amazing fun and I was lucky to be around such excellent company! On both trips I was reminded just how important the aspect of location can be when choosing a campsite. But before getting into the details, let's enjoy some pictures! The first three pictures are more relevant to the topic at hand (more on that soon) and the last four I just thought were cool:


There are many other factors and aspects of locations you choose to camp, but the ones examined here are often the more central or important ones to take into consideration. Being wet and covered in bug bites is bound to put nearly everyone in a bad mood, so if you are able and willing, try and account for these details.
Yet at the same time, don't get too discouraged if you find yourself having to deal with rough conditions at your chosen campsite (especially the deeper in the woods you go); part of the fun is the challenge of dealing with rough conditions and in the end making things as comfortable and cozy as possible. If anything, it makes your return home seem all the more luxurious. Camping can really highlight how much we take simple pleasures for granted, like clean tap water at hand at all times, shelter from the wind and rain, warm food easy to produce, etc.
These two trips were amazing and everyone had a great time, in spite of some of the more difficult aspects of the locations my groups and I had to deal with. Well...11 camping trips so far this year, and my hunger to get back out into the woods remains the same.
I have been camping and exploring a very remote part of Sweden near the boarder of Norway for several years now. I have really fallen in love with a huge patch of challenging, raw, beautiful, isolated woods. Much of this patch is even doesn't even have any trails or roads, but on occasion there are some old logging paths and dirt backroads that are helpful in navigation and cutting through or around more unpleasant patches, like swamp and impassible cliffs. I named this whole area the Bråten (Swedish for rubble or ruins) woods, after discovering a ruined old cottage out there on my first camping trip there.
Last month I spent a few nights in Bråten woods with some bushcraft buddies I met through a website, and this past weekend I spent the whole weekend there as well, but this time with members of the camping club I founded and run called GUCK. Both trips were amazing fun and I was lucky to be around such excellent company! On both trips I was reminded just how important the aspect of location can be when choosing a campsite. But before getting into the details, let's enjoy some pictures! The first three pictures are more relevant to the topic at hand (more on that soon) and the last four I just thought were cool:

May trip, Johan and I checking out the lake near our first campsite.

May trip, 2nd night with our Bushcraft buddies. Left to right is Ruben, Johan, Jon, me, and Chris. Thanks again to Chris for posting these pictures.

June trip, a view from across the lake of our campsite on our 2nd night out. A large bog is hidden around the bend of the penninsula.

June trip, the view from our first campsite.

June trip, the view from one of the hills we climbed up on our way to our 2nd campsite.

June trip, climbing around the cliffs that surrounded the lake near our 2nd campsite.

The GUCK crew taking a break in the middle of nowhere. Left to right, Lena, Jenny, Lovisa, Mr. Beardy's legs and arm, and me. I only look so serious because it's tricky to take a good picture on your own.
Location can make a big difference on your general comfort level while camping, and certain details are often neglected or forgotten. In my case on these two trips, I understood the risks involved in the locations that were picked, but took my chances to observe what would happen.
On the first night of my May trip, there were clear skys so Johan and I chose to sleep out in the open with no shelter, but lots of cover from the woods (trees, brush, etc.). The cover and vegitation soaked up and prevented any condensation, and we woke up dry as a bone. We also slept only 20-25 meters from a lake (1st picture above), but were not given any problems from bugs.
We then meet up with the other guys on the 2nd night, and all agreed that the weather still looked good with little chance of rain, so we opted again to sleep out in the open. This time, however, we slept in a clearing (2nd picture). When we woke up, all our gear and sleeping bags were soaked with condensation, but at least we still had no issues with bugs. Lucky for us, the sun came up and we were able to hang our sleeping bags and such, and everything dried up in not too long.
On the June trip, the first night the group decided to sleep in an abandoned house I had stumbled upon that was in habitable condition. This choice had a lot to do with the fact that it was raining all day. It was a bit of a gamble, as who knows what animals might be using the house, or what leaks there might be, but it worked out great. It was very cozy and everyone slept well.
The 2nd night of this trip we would spend next to a lake, only this lake I had not been to before, so we would have to scout for a good spot for a campsite once we got there. After a long and tough hike through rough terrain, we get to the lake and it is amazing. We see a large penninsula on the other side of the lake and agree to make camp there. We did notice a bog on the other side of the penninsula, which would pose a bigger bug issue, but we had bug spray with us and also figured that we could have a fire going to help keep them away. We set up camp after a nice swim just 10-15 meters away from the lake.
We soon found to our shock just how bad of a bug situation we would have to deal with. The bug spray simply didn't work against the millions and millions of biting midges that were waiting for us. We got a fire going, and that didn't help either unless you stood direcly in the smoke of the fire, which is no fun getting all that smoke in your eyes. Then before we can even talk about moving spots, it starts to rain, so too tired to care, we kept our campsite but hid in our tents from both rain and getting eaten alive.
The point is, try and take as much into account when picking your campsite, and be ready to deal with any down-sides that might come with any given site. Also keep in mind that two campsites might look very much alike, but camping at each might be very different experiences--often for less than obvious factors--or reasons out of your control. For example, sleeping near a lake.
Some lakes don't have much or any bog/swamp, and thus have less stagnant water, which amounts to less mosquitoes and biting midgs (e.g. May trip 1st night vs. June trip 2nd night). Clearings are great for watching the stars at night, but expect to be wet in the morning after sleeping in the middle of a clearing without any cover. Having water close by makes life easier, being able to drink the water (sanitize if needed), and in the case of larger bodies of water, one can also swim and/or wash clothing. So access to water may trump dealing with bugs.
Some lakes don't have much or any bog/swamp, and thus have less stagnant water, which amounts to less mosquitoes and biting midgs (e.g. May trip 1st night vs. June trip 2nd night). Clearings are great for watching the stars at night, but expect to be wet in the morning after sleeping in the middle of a clearing without any cover. Having water close by makes life easier, being able to drink the water (sanitize if needed), and in the case of larger bodies of water, one can also swim and/or wash clothing. So access to water may trump dealing with bugs.
There are many other factors and aspects of locations you choose to camp, but the ones examined here are often the more central or important ones to take into consideration. Being wet and covered in bug bites is bound to put nearly everyone in a bad mood, so if you are able and willing, try and account for these details.
Yet at the same time, don't get too discouraged if you find yourself having to deal with rough conditions at your chosen campsite (especially the deeper in the woods you go); part of the fun is the challenge of dealing with rough conditions and in the end making things as comfortable and cozy as possible. If anything, it makes your return home seem all the more luxurious. Camping can really highlight how much we take simple pleasures for granted, like clean tap water at hand at all times, shelter from the wind and rain, warm food easy to produce, etc.
These two trips were amazing and everyone had a great time, in spite of some of the more difficult aspects of the locations my groups and I had to deal with. Well...11 camping trips so far this year, and my hunger to get back out into the woods remains the same.
Wednesday, June 15, 2011
Five pleasant camping luxuries (wants)
A follow up to my last post about needs, this time exploring five of my current favorite luxuries to take with me to the woods. Some people might call certain choices not "wants" but "needs", and I already went over the subjective nature of these concepts. Suffice to say, I would argue you don't "need" the following five items from a survival perspective, and can improvise solutions to replace these things, which I will cover shortly.
Here they are:

1. (top left) Small tin of instant coffee (weight 42g), small tub of powdered milk (24g), fast food sugar packs (about 5g each).
2. (top right) Small tin of spices (25g), fast food salt packs (about 2g each).
3. (middle left) Insect repellant (57g)
4. (middle right) Lip balm (12g)
5. (bottom) Hygiene kit (about 90g total), note that the soap is biodegradable.
I left out costs because a lot of the above are free/recycled, or very cheap. The uses should be fairly obvious, but of course I like to note more not-so-obvious uses that might be helpful.
Having coffee/tea around while camping encourages hydration, as sometimes drinking plain water can be boring. You have to boil water in order to make a good hot cup of coffee/tea, which will sanitize the water, and if it is cool or cold outside, a hot drink also helps prevent or combat hypothermia. Adding some sugar gives a small kick of energy, which is often needed while out in the woods, as hiking out to get there in the first place is often a work out (especially through rough terrain). Also keep in mind that the containers themselves can be useful tools, for example the coffee tin could be emptied and used as a small cup to drink from (say a friend forgot one) or to gather bugs/worms for bait for fishing.
Spices and salt add zest and flavor to food, encouraging you to eat more, which is important so that you have energy. Camping is not a good time or place to start a diet or a fast, especially if there is an emergency situation--say you get hurt. You will need extra energy to make it through a crisis, so eat well out in the wild. Spices have other benifits, depending which one, for example garlic powder is a favorite of mine and garlic is also a natural insect repellant. Salt aids in hydration, and can also be used to make a salt water solution to gargle if you have a sore throat, or to clean out stuffy sinuses.
Insect repellant is very often quite flammable, so it can double as an emergency firestarter and fuel source.
Lip balm need not only be used on the lips, you can also rub it on other parts of your body that might be dry. It is mostly fat, so you could melt it down and mix it with wood ashes to make a crude soap.
The toothbrush can also be used in first aid. I recently went on a day-hike with my sister in law, and she cut her finger. I made sure to rinse the cut with some clean water, but noticed there was some dirt stuck in the cut (and of course it is important to prevent an infection to remove all debris from a wound), and it was tricky to finally remove all the little bits of dirt. Having a toothbrush would have made it easier, but since it was just a day-trip I didn't bring it with me. The toothpaste can also be used on a boil or pimple (a classic high-school trick for zits) to prevent it from getting worse, and the soap can also be used to wash not just your body but your clothing too.
Did you forget these at home? Here are some alternatives:
1. Make a wild herbal tea. You can use lots of different plants, a classic bushcraft treat is lumberjack tea, and all it takes is hot water and some pine needles. Nearly all pine needles are edible, and have vitamins as well to keep you healthy. You can also boil up a handful of berries, add some sugar and you have the bushcraft version of Kool-Aid.

2. As above with wild herbal tea, you can also gather herbs to cook with for more flavor. Wild onions or ramps are a great find, for example. Then of course there are wild mushrooms that are one of my favorite things to eat. Be VERY careful anytime you venture into wild edibles, however, as there are plenty of poisonous plants and fungi out there, and you must be 100% sure of what you eat. In the future I will devote more time to the wonderful subject of wild edibles, especially mushrooms, which I am a huge aficionado of.

3. By now you should be detecting a pattern. Yup, you guessed it, mother nature also provides natural insect repellants. Some you can ingest and will make your general scent you give off less attractive to bugs, like garlic which I already mentioned. Others you use externally. Cinnamon is another example, and can be used both on the inside or outside of your body, and tastes and smells very good to most people (myself included).
Whitecedar trees are also effective at keeping bugs away, if you can find it (not to be confused with true cedar trees). Pineapple weed (Matricaria discoidea, Swedish Gatkamomill, and pictured below) also repells bugs, and I have found this growing in center-city parking lots here in Sweden. If you find either of these natural insect repellants (or others), just mash some of it up in your hand and rub it on yourself or your clothing.

I am lucky in that I love garlic, onions, and cinnamon and used all three at home often. Even when I don't use any insect repellant, I usually don't get that many bug bites. What also helps is to use a soap with lemon, lavender, or eucalyptus oil (which I also do) at home, which are also effective repellants. A body soap/rub that I highly recommend is called "Rub Rub Rub" and has lemon oil in it, and is availible at Lush.
4. If your lips get dry, and you have any kind of cooking oil with you like olive oil, problem solved. But what if you don't have any lip balm or oil? Maybe you have nuts with you, a common camping snack that are high in fat. Mash some up between two rocks and rub the paste on your lips, and then eat the paste. If your lips are very chapped, however, be careful with the salt (ouch!) that most nuts are coated with! Rinse them first then mash.
5. Make an improvised toothbrush out of a twig. It's easy, all you have to do is find a nice, clean, birch tree twig; then peel the bark off and chew on it. Once it is soft and the fibers split from chewing, you can rub your teeth, and the inner bark of birch can be ingested safely. You can also make a natural mouthwash by boiling acorns which are high in tannins that are astringent, just be careful not to swallow, as too many tannins can make you sick.

With the low weight and cost of these nice luxuries, there is little reason not to take these or similar luxuries (tea bags rather than coffee, for example, if you don't like coffee) with you to the woods. Only the more hardcore ultralight zealot would scoff at bringing these five items, which total weigh only around 264g. Remember the goal is to have a good time, and small comforts like a hot cup of coffee, yummy food, no bug bites, kissable lips, and being nice and clean ("So fresh and so clean-clean!") work wonders in making a camping trip a more pleasant experience.
Here they are:

1. (top left) Small tin of instant coffee (weight 42g), small tub of powdered milk (24g), fast food sugar packs (about 5g each).
2. (top right) Small tin of spices (25g), fast food salt packs (about 2g each).
3. (middle left) Insect repellant (57g)
4. (middle right) Lip balm (12g)
5. (bottom) Hygiene kit (about 90g total), note that the soap is biodegradable.
I left out costs because a lot of the above are free/recycled, or very cheap. The uses should be fairly obvious, but of course I like to note more not-so-obvious uses that might be helpful.
Having coffee/tea around while camping encourages hydration, as sometimes drinking plain water can be boring. You have to boil water in order to make a good hot cup of coffee/tea, which will sanitize the water, and if it is cool or cold outside, a hot drink also helps prevent or combat hypothermia. Adding some sugar gives a small kick of energy, which is often needed while out in the woods, as hiking out to get there in the first place is often a work out (especially through rough terrain). Also keep in mind that the containers themselves can be useful tools, for example the coffee tin could be emptied and used as a small cup to drink from (say a friend forgot one) or to gather bugs/worms for bait for fishing.
Spices and salt add zest and flavor to food, encouraging you to eat more, which is important so that you have energy. Camping is not a good time or place to start a diet or a fast, especially if there is an emergency situation--say you get hurt. You will need extra energy to make it through a crisis, so eat well out in the wild. Spices have other benifits, depending which one, for example garlic powder is a favorite of mine and garlic is also a natural insect repellant. Salt aids in hydration, and can also be used to make a salt water solution to gargle if you have a sore throat, or to clean out stuffy sinuses.
Insect repellant is very often quite flammable, so it can double as an emergency firestarter and fuel source.
Lip balm need not only be used on the lips, you can also rub it on other parts of your body that might be dry. It is mostly fat, so you could melt it down and mix it with wood ashes to make a crude soap.
The toothbrush can also be used in first aid. I recently went on a day-hike with my sister in law, and she cut her finger. I made sure to rinse the cut with some clean water, but noticed there was some dirt stuck in the cut (and of course it is important to prevent an infection to remove all debris from a wound), and it was tricky to finally remove all the little bits of dirt. Having a toothbrush would have made it easier, but since it was just a day-trip I didn't bring it with me. The toothpaste can also be used on a boil or pimple (a classic high-school trick for zits) to prevent it from getting worse, and the soap can also be used to wash not just your body but your clothing too.
Did you forget these at home? Here are some alternatives:
1. Make a wild herbal tea. You can use lots of different plants, a classic bushcraft treat is lumberjack tea, and all it takes is hot water and some pine needles. Nearly all pine needles are edible, and have vitamins as well to keep you healthy. You can also boil up a handful of berries, add some sugar and you have the bushcraft version of Kool-Aid.

2. As above with wild herbal tea, you can also gather herbs to cook with for more flavor. Wild onions or ramps are a great find, for example. Then of course there are wild mushrooms that are one of my favorite things to eat. Be VERY careful anytime you venture into wild edibles, however, as there are plenty of poisonous plants and fungi out there, and you must be 100% sure of what you eat. In the future I will devote more time to the wonderful subject of wild edibles, especially mushrooms, which I am a huge aficionado of.
3. By now you should be detecting a pattern. Yup, you guessed it, mother nature also provides natural insect repellants. Some you can ingest and will make your general scent you give off less attractive to bugs, like garlic which I already mentioned. Others you use externally. Cinnamon is another example, and can be used both on the inside or outside of your body, and tastes and smells very good to most people (myself included).
Whitecedar trees are also effective at keeping bugs away, if you can find it (not to be confused with true cedar trees). Pineapple weed (Matricaria discoidea, Swedish Gatkamomill, and pictured below) also repells bugs, and I have found this growing in center-city parking lots here in Sweden. If you find either of these natural insect repellants (or others), just mash some of it up in your hand and rub it on yourself or your clothing.
I am lucky in that I love garlic, onions, and cinnamon and used all three at home often. Even when I don't use any insect repellant, I usually don't get that many bug bites. What also helps is to use a soap with lemon, lavender, or eucalyptus oil (which I also do) at home, which are also effective repellants. A body soap/rub that I highly recommend is called "Rub Rub Rub" and has lemon oil in it, and is availible at Lush.
4. If your lips get dry, and you have any kind of cooking oil with you like olive oil, problem solved. But what if you don't have any lip balm or oil? Maybe you have nuts with you, a common camping snack that are high in fat. Mash some up between two rocks and rub the paste on your lips, and then eat the paste. If your lips are very chapped, however, be careful with the salt (ouch!) that most nuts are coated with! Rinse them first then mash.
5. Make an improvised toothbrush out of a twig. It's easy, all you have to do is find a nice, clean, birch tree twig; then peel the bark off and chew on it. Once it is soft and the fibers split from chewing, you can rub your teeth, and the inner bark of birch can be ingested safely. You can also make a natural mouthwash by boiling acorns which are high in tannins that are astringent, just be careful not to swallow, as too many tannins can make you sick.
With the low weight and cost of these nice luxuries, there is little reason not to take these or similar luxuries (tea bags rather than coffee, for example, if you don't like coffee) with you to the woods. Only the more hardcore ultralight zealot would scoff at bringing these five items, which total weigh only around 264g. Remember the goal is to have a good time, and small comforts like a hot cup of coffee, yummy food, no bug bites, kissable lips, and being nice and clean ("So fresh and so clean-clean!") work wonders in making a camping trip a more pleasant experience.
Tuesday, June 14, 2011
My top five pieces of camping gear (needs)
Wants vs. needs: when it comes to camping, what does each term mean? Wants and needs are two very subjective words to be sure, one could say that all we really need is air, water, food, and the rest are just details. However, there are things you bring with you (camping and otherwise) that are more useful than other things. Plus, if it were to come down to survival or life-and-death situations, certain gear is going to be more important to have over other gear. That being said, here are the five items that nearly always come with me into the woods:

From left to right:
1. Big, black, garbage bag - weight 77g - cost, about 3 SEK
2. Knife and sheath (Mora Forest Bushcraft model) - 143g - 199 SEK
3. Swedish firesteel (Light My Fire) - 28g - 79 SEK
4. Map and compass - 135g total - cost varies depending on the map I am using (some are free), and the compass was a gift from my wife so not sure about the price (there are compasses as low as 50 and range all the way to several hundred SEK)
5. Titanium pot (Snow Peak 700ml) - 92g - gift from my father, but solo titanium pots range between 300-500 SEK (my father said it was around 40 USD in the USA)
Some common uses:
1. Ground cover to sit/lay/kneel, backpack rain cover, container to gather water, mini-tarp for a improvised shelter, stuffed with leaves/moss for a sleeping mat or pillow.
2. Carve grill sticks to cook food or chop sticks to eat, gut and clean fish, slice up food or cut up your garbage bag, split firewood, trim poles and sticks for improvised shelter.
3. Start a fire, one of the most important elements in camping/survival, can even spark in wet conditions, and has about 3000 strikes worth of sparks. Fire provides heat, light, a means to sanitize your water and cook your food, keeps mosquitoes away, raises morale, and even the ashes that are left after a fire goes out can be used to make an improvised soap when combined with fat.
4. Find where you are going, especially useful/important if you get lost. Some compasses, like mine, have a mirror (not just handy to see yourself, but also to signal), a magnifying glass, and most compasses have small rulers where you can measure several centimeters (if anything, good for figuring out exactly how big a fish is if you catch a big one and want bragging rights :)).
5. Collect water, boil water, cook food, doubles as a large mug if you make coffee/tea, container to collect wild edibles like berries or mushrooms.
Aside from these more common usages, there are other uses for perhaps a more desperate situation. For example, the garbage bag can be made into an extra layer of improvised clothing if you are cold, and of course is also water proof. A knife makes an excellent weapon, should you be forced to defend yourself, and can also be used to gut and clean any other animals for food, not just fish. If you are unable or unwilling to have a fire at night, and an unwanted animal visitor shows up, you could scare it away with the sparks (they are quite bright) and a few yells. The map can always be used as an emergency firestarter or crude gauze (unless you are lost of course!), and the compass is made of plastic, so it can be melted down and used as improvised glue or fuel (again, only if you are desperate and not lost). The pot could be used as a dry, portable stove if fire is a priority and conditions are difficult (and perhaps time and energy are a factor) for a traditional campfire.
My next post will cover five of my favorite wants or camping luxuries, which make the time you spend out in the woods more enjoyable, and at not much of a burden in both weight and cost.
Saturday, June 11, 2011
Sleep... Zzzzzzzzzzzzz...
Sleeping in the Wild
What defines camping as camping and not, for example, hiking is spending the night in the wild. This means sleeping out in the wild, which of course presents several challenges, but these challenges can be easily overcome, and if done properly ensure a good night’s sleep equal or even better than sleeping at home. Let us example some solutions with the goal in mind of sleeping comfortably out in nature.
Due to a large part of camping having to do with this sleeping aspect, I strongly suggest that the would-be or novice camper take this aspect very seriously. It really can mean the difference between a pleasant trip and an unpleasant trip. There are of course many options and alternatives, but I will go over the most common and/or accessible ones. Remember the most important fundamentals of having a good night’s sleep are to be both warm and dry, and these two elements should always be achieved while camping. Only after covering warmth and dryness should one then move on to personal preferences about comfort. Staying dry is the job of a good shelter, such as a tent or tarp, so the focus here will be on warmth.
There are generally four effective methods to staying warm in the wild: clothing, sleeping bag, insulation from the ground, and fire. Fire is not always an option to keep a novice camper warm all through the night, is not possible in a tent, and also goes into a more advanced realm of survival knowledge; thus, the focus will be on the other three areas of staying warm.
Clothing is entirely up to the individual camper, and most people already have the clothing they need at home to stay warm. As such, little will be said here about clothing. One should keep the weather in mind, and dress accordingly. Extra clothing and changes of clothing are possible of course, but also keep in mind that one can also wear the same clothing worn during the day to sleep at night without having to bring as much extra clothing. An overnight trip is a short adventure, so one can always change into clean clothing after coming back home and having a nice hot shower/bath. One can also use rain gear for addtional layers of warmth.
A big debate in the diverse camping communities regarding sleep centers around sleeping bags, and from my experience more dedicated campers (especially UL campers) seem to favor down bags more. For example, there is much debate within the choices of sleeping bags, which are nearly all either made up of synthetic or down feather filling. Both synthetic bags and down feather bags have their pros and cons (but usually look the same, so I won’t put pictures as examples):
Synthetic sleeping bags
Pros: Cheaper, easier to dry off when wet, will still provide some warmth when wet
Cons: Heavier, bulkier, not as warm as down in extreme cold
Down sleeping bags
Pros: Lightweight, easier to compress/less bulky, warmer in extreme cold
Cons: Expensive, difficult to dry when wet, will not provide much warmth when wet
All sleeping bags have a temperature rating, which is the recommendations of the manufacturer, but remember that comfort is subjective and everyone is different. The temperature ratings, however, are useful to evaluate the general warmth abilities of a given sleeping bag. There are often different temperature ratings for men and women, women seeming to in general require more warmth than men. I am admittedly ignorant as to why, but from my experiences I can say that this has been the accurate.
There are summertime sleeping bags that weigh less, and offer enough warmth for warmer summer nights, around 15 to 10 degrees C. There are winter bags than weigh more and offer warmth up to extreme cold down as far as -40! Then there are bags that are known as “3 season” bags, which range in between these temperatures. My main sleeping bag, for example, has a comfort rating of 5 for men, and an extreme rating of -7.
The temperature rating can be adjusted by the user many ways. Clothing is the most obvious method, wearing more clothing inside a sleeping bag will make you warmer. But one can also bring a bivy bag (a cover for your sleeping bag that is often water resistant), a cotton or silk sheet, or small blanket to put inside the sleeping bag. These are more conventional solutions, and are very effective at providing and retaining warmth. More unconventional yet effective are using space blankets, rain ponchos, and garbage bags inside the sleeping bag for more warmth--or go "barbarian" style and stuff your sleeping bag full of natural material like leaves, moss, and grass. It is also worth noting that some campers prefer to use wool blankets rather than sleeping bags, but keep in mind that these can be both bulky and heavy.
The next important factor in keeping yourself warm while you sleep is insulation from the ground. Your body heat is sucked away into the earth due to convection, and cold air sinks and warm air rises. To combat these constant factors of heat loss in the wild, one ought to separate one’s self from the ground as much as possible to stay warm and keep warmth. There are several different methods to accomplish this, and can also be used together in combinations if needed for added protection. Here an additional option should be noted, which is to sleep in a hammock.
Hammocks present different challenges, which I will not go into here, and also require that there are two strong anchors (such as two trees) in order to function. So sleeping on the ground is a more flexible option, as there are not always two trees just the right distance apart to set up a hammock, which is why I personally do nearly all my sleeping on the ground rather than a hammock. I don't have anything against them, and they are a good option to be sure, but not if you want to sleep say, right next to a lake or in a clearing.
Before moving on to several of the most common and effective sleep/warmth aids, I strongly recommend that no matter how you choose to sleep on the ground outdoors, that you use a ground cover, such as a large piece of plastic/tarp, for waterproofing and protection from any rough things like sticks from damaging your mat and/or tent. Here is an example of a ground cover, my homemade one of tarp and space blanket:

Natural materials (pine branches, leaves, etc.):

Pros: Free, organic, ecological, readily available/zero weight in backpack
Cons: Takes time and energy to gather and build
Foam mat:

Pros: Cheap, lightweight, non-inflatable saves some time/energy, if damaged they don’t deflate
Cons: Bulky, mediocre insulation
Note: Can be trimmed down to save on bulk/weight to torso length, as your legs require less insulation and padding
Inflatable mat:

Pros: Easy to pack/compress, usually lighter weight than self-inflating mats, good insulation
Cons: Expensive, takes time and energy to blow up, if damaged they deflate Note: Best used with synthetic sleeping bags, availible in both regular and "mummy" shape (picture above)
Self-inflating mat:

Pros: Easy to unroll and use, inflates itself (mostly), good insulation
Cons: Expensive, bulky, usually heaviest mat choice, if damaged they deflate Notes: Best used with down sleeping bags, availible in regular and torso sizes
Again, comfort is subjective, so one ought to give thought to what one likes as far as sleeping goes. Some people like very soft bedding, others like firm bedding. The softest choice is an inflatable mat (or a hammock), and the firmest is just a ground cover over natural materials.
There is a lot more information out there on the subject sleeping outdoors, but of course you should be careful with what kind of information you read. Just because some guy from Indiana claims to sleep inside a hole in the ground, does not mean it is true or that it is an effective or pleasant way to sleep in the wild. Always be skeptical! Due to sleeping being such a big part of camping, I strongly suggest time be taken to find the best solution that works for you, and if there is any type of gear to spend a little extra money on, I would say that a good sleeping bag and mat are things that are worth it.Friday, June 10, 2011
Different Styles of Camping
Different Styles/Philosophies of Camping
Every camper has different needs, wants, preferences, and goals. The way in which people camp is often linked to what they choose to bring with them. A piece of gear one camper calls essential, another might call unnecessary and would leave at home (or not even own). Here are some general definitions of some different schools of camping, and please note that it is possible to mix certain styles rather than be a purist:
Minimalist/Bushcraft – One that takes the “bare essentials” when camping, chooses to use cheap/free gear, takes more advantage of natural resources, but may or may not have low weight as a priority. Ray Mears is a master (easily one of the best in the world) of Bushcraft and his writings and documentaires I am a big fan of and were/are an influence in my progression as a bushcrafter/camper. Examples of gear a more minimalist/bushcraft influenced camper might take with them are an old wool blanket, sturdy knife and/or axe, canteen for water, pot for cooking over campfire, etc. Pros: Cheap, easy to pack; Cons: Considered “uncomfortable” by some, more advanced knowledge and skills required
High-Tech – Opposite of Minimalist. Has the top of the line gear and covers many different wants/needs, but may or may not have low weight as a priority. Examples of gear would be pretty much most of what you will find at camping/outdoor specialty stores, and most campers own at least a few pieces of high-tech gear. Pros: Considered “very comfortable” by some, only very basic knowledge and skill required; Cons: Expensive, difficult to pack
Ultralight – One that has a low *base weight (*all gear not including consumables and clothing) of gear as a main priority, and is typically defined as a base weight of less than 10lbs/4.5kg. Examples of gear a more ultralight influenced camper might take are down-feather sleeping bag, razor blade, recycled plastic bottle for water, mini-alcohol stove for cooking, etc. Pros: Saves energy, opens up camping as an option for people unable to carry heavy loads such as the physically weak or handicapped; Cons: Narrower options for choice of gear, certain gear tends to favor high-tech (i.e. expensive)
Lightweight – Similar to Ultralight, but low base weight less of a priority, and is typically defined as a base weight of less than 20lbs/9.1kg.
Traditional – Low base weight not a main priority, typically defined as a base weight of 20lbs/9.1kg-40lbs/18.2kg.
Obviously there are other styles of camping and different schools of thought on the matter, but these are just a general overview of some of the more prevalent ones, or at least the ones I have the most experience with or that are an influence to me. I would not label myself as a member of any one group of campers, and choose to be more of a hybrid style, picking up what I feel are the useful influences and leaving behind what I deem are the not-so-useful. It also depends a lot on the details of any given camping trip that I will draw more from one school than another. For example, what season, how long the trip will be, how many other campers (if any) are going, what terrain, what weather, etc. -- these all play a part in how I will choose to camp on a given trip.
If you want to dig in and learn more about the above schools of thought, google and wikipedia are your friends, and saves me having to put a whole bunch of links throughout the text. :)
Camping Gear Fundamentals
Gear 101: Basic Needs and Options
This is a basic overview of gear that needs to be covered by the novice camper. After these areas are covered, the rest of your gear is left open to anything you feel is worth hauling with you into the woods. It’s your backpack and your energy to burn, but keep in mind that it is also you that will have consequences to pay if you either bring not enough or too much gear.
THE BIG THREE: WATER, SHELTER, FOOD
These are your top priorities not only for camping, but for survival. Note that the importance of each need depends on the situation, for example water would be a much higher priority if one where to live in Saudi Arabia.
WATER – Lucky for me, I live in Sweden, which has a rich source of fresh water that is generally clean and safe to drink (with certain precautions). Wild water should usually be sanitized (e.g. boiled), and you should always take at least some water with you. Don’t go crazy hauling water, however, as one liter of water weighs one kilogram. There are many methods to collect wild water, from building a small solar distillary, to using plants, to soaking up dew with your t-shirt. However, these methods should be used for emergency, or for fun to practice your survival skills. Idealy, you should have enough water at all times, and be able to find and use the more dependable and easier to collect sources of fresh water such as lakes, rivers, streams, springs, and rain.
SHELTER – There are many options for shelter while camping. You can buy a tent, but not only will it cost money, it will also cost you energy hauling it. Prices and weights of tents vary greatly, and so does quality, so make sure to do research before you buy. A very important function of a tent (or shelters in general) is that it is WATERPROOF. You can also sleep under a tarp or big piece of plastic, or build an improvised shelter out of natural materials found in the woods. These options are of course cheaper and lighter weight, but require more skill and knowledge.
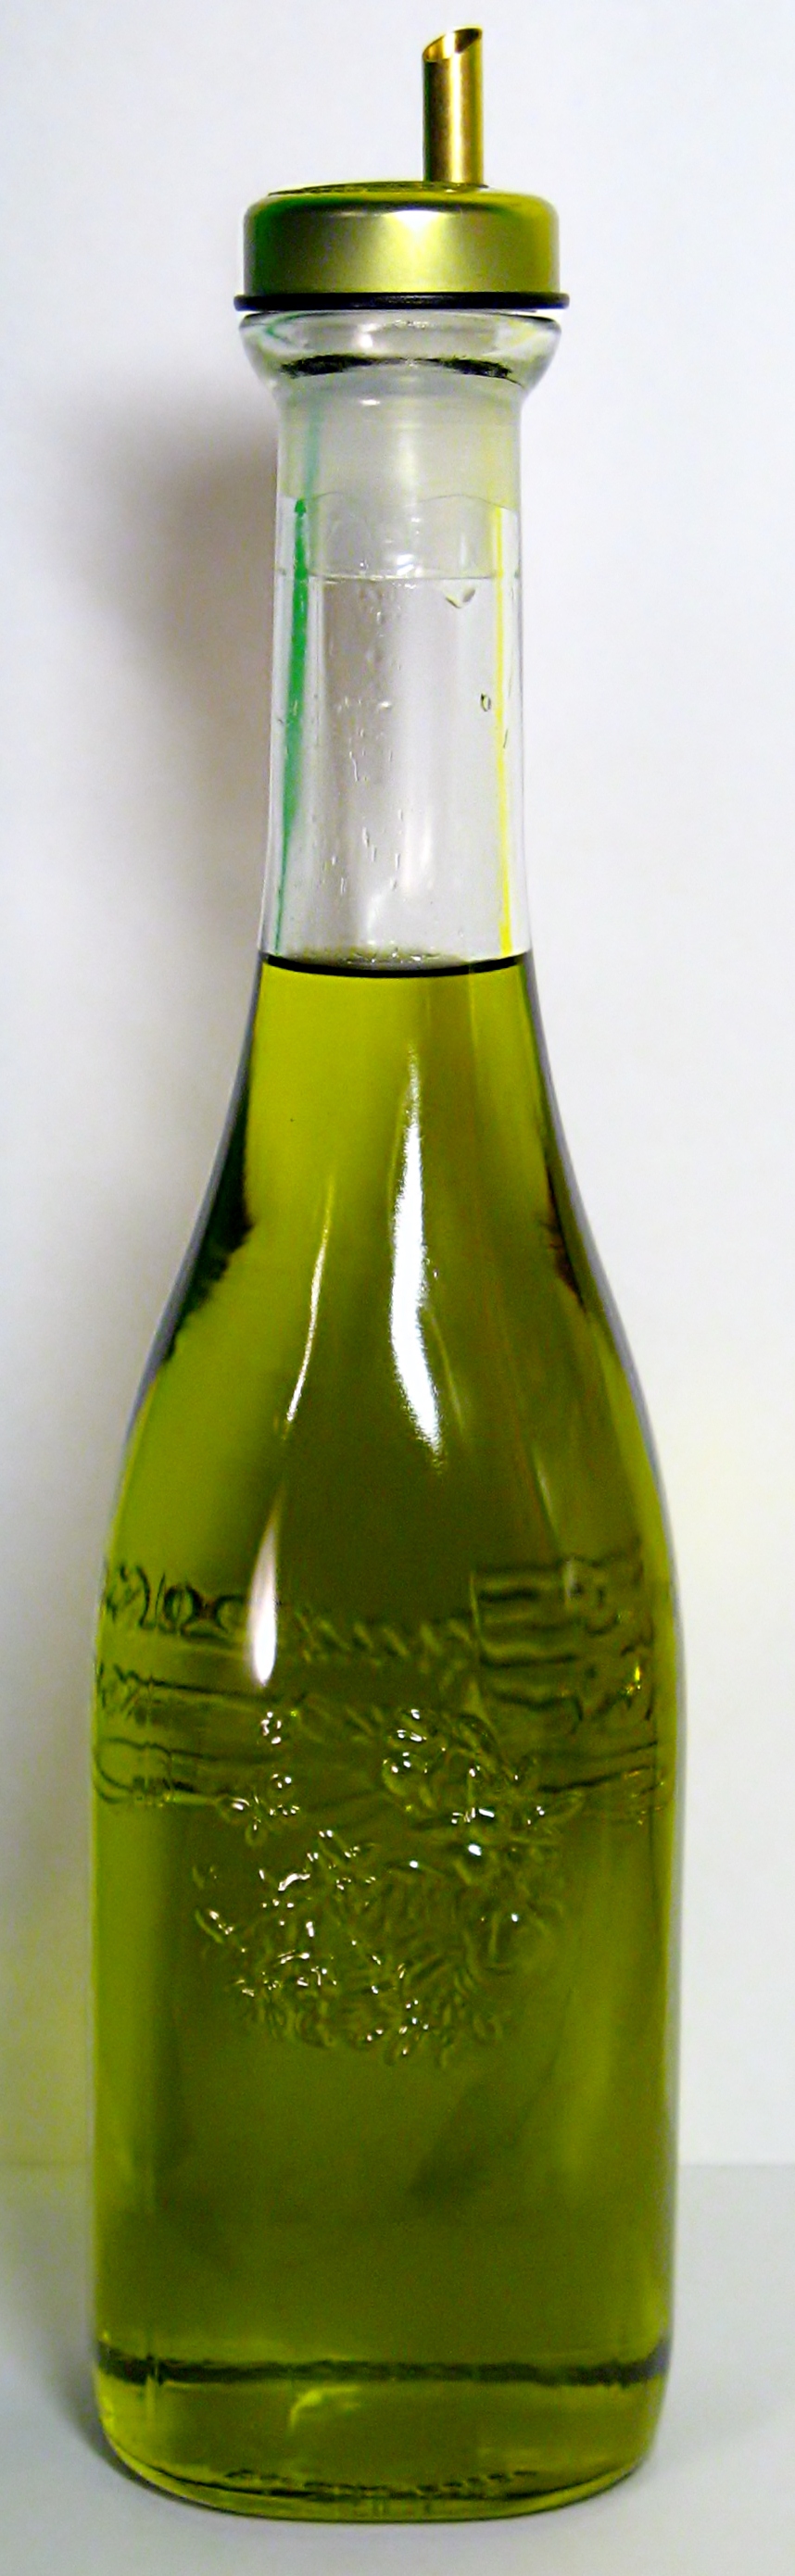
FOOD – Camping usually involves high-energy activities such as hiking and swimming, so make sure to pack food that is high in energy. Note that high energy does NOT have to mean unhealthy, some good examples are: nuts, pasta, lentils, olive oil, oatmeal, dried fruit, dried meat, etc. Food has a huge range of options, but one ought to keep in mind preparation and weight in the choices as well as nutrition. How will you cook/eat your food? Perhaps you don’t have to cook your food at all. How much does your food weigh? Perhaps you can save on weight choosing for example dried foods over canned foods.
Other Essential Gear
First Aid Kit – This should go without saying! Also keep in mind any medication you use or could need. Store bought kits are fine, but for the avid camper, I recommend building your own kit to suit your needs and cut down on weight and bulk.
Knife – Should need no explanation, a tool of significant usefulness. Many options are available, but what is most important is that the knife is sharp and the person using the knife does so SAFELY. It should be noted that there are high-quality knives out there for reasonable prices thanks to technology, so you don't have to get a fancy military issue knife for thousands of crowns.
Compass and Map – A camper should always know where they are, and these should only be left at home if you are very familiar with the terrain and don't plan on doing any exploring at all. Many cell phones have both compass, map, and even GPS--but remember that cell phones run on batteries!
Proper Clothing – Based on the time of year and conditions, a camper should always make sure to be prepared with the right combination of clothing. This includes rain gear, and also includes proper footwear, such as boots or tough sneakers. At the bare minimum, an extra pair of socks should be packed, if not other extra clothing such as a spare t-shirt or sweater.
Sleep System – There are many options as far as sleeping in the wild goes, from sleeping bags vs. wool blankets, to inflatable mattresses vs. foam pads. I will post a full article further elaborating on this subject in the future. Keep in mind that according to the US Army survival guide, up to 80% of your body heat can be absorbed into the ground. Insulation from the ground is important to keep warm, and is often neglected by novice campers.
Emergency Signaling – Just in case of an emergency, a camper should always have a method of getting help. Fully charged cell phones fulfill this need, but are prone to failure (e.g. no reception or battery dies), so other steps should be taken in addition to a phone. For example, a whistle is a good way to be heard, and a brightly colored piece of clothing or gear is a good way to be seen.
Fire Starters – Matches and a lighter work, but there are other options such as flint and steel or a magnifying glass. Tinder is also useful to have along with fire starters, such as a candle or newspaper, and should all be stored in a water proof container. Fire provides heat, light, keeps away mosquitoes, and is a morale booster. A fire can also be used to signal in the event of an emergency. Food can be cooked over a campfire, but can also be cooked over a small alcohol stove, depending on what gear is available.
Flashlight - Another piece of gear that has many options, but thanks to technology, there are many very good choices for low prices. Plus, there are also flashlights that do not require batteries, and run on a hand-crank. LED lights run on batteries, but last much longer than other older models, and LED lights can also be so small and light you can hang one on your keychain.
A Big, Black, Garbage Bag - Cheap, easy to find, and only around 80g each, the humble garbage bag is something I never leave home without. It can be a small ground cover for you to sit/lay down so you don't get wet or dirty, an emergency layer of clothing, a container for LOTS of water, a backpack rain cover, and can even be used to make an improvised shelter or to repair a tent or tarp that is damaged.
Additional gear that is helpful:
Small axe or saw, cooking equipment (e.g. a pot or metal mug), fishing gear, string, rope, duct tape, plastic bags, a good book, personal hygiene kit (e.g. soap, tampons, toothbrush/paste, etc.), trowel/small shovel, toilet paper, small towel or bandana, fork, spoon, bowl or plate, insect repellent, and anything else you just can’t live without or can’t leave at home.
Tuesday, June 7, 2011
A Long Introduction to Cesar and The Woods
 |
| I do other things besides backpacking, you know. |
As far as backpacking/camping goes, I was fortunate to have been born into a set of circumstances that has greatly facilitated my passion for the outdoors. My father was in the US Army, is the veteran of two wars, and the survival training he taught was a big influence on me. My mother was a nurse, and the same can be said of the valuable training she taught me. Both of my parents are immigrants from Latin America to the USA, and this perspective was also very valuable, as it is one that has an emphasis on being frugal and self-sufficient. In addition to the vast amounts of information made available to me through my parents, I was also given ample opportunity to put what I was taught to use. As a military family, we moved a lot, and in my youth I often found myself in a new town. Luckily these towns had plenty of woods for me to take advantage of, for example military bases in Germany when I was in grade school, and a boring little town in central Pennsylvania when I was in high school.
The boring little town was both a blessing and a curse. A curse, because as a teenager in a rural landscape of only 17,000 inhabitants, there is little to do and little that caters to your desires of excitement and adventure. It was a blessing because this situation challenged me to create my own things to do, and to seek out my own excitement and adventure. Stomping around the woods with an old blanket and a can of beans was very fun at times, but many times difficult and uncomfortable, and the more challenges I faced, the quicker I learned that I lacked the skills and equipment to fully deal with what nature threw at me. Today I could have taken advantage of the wealth of resources available online, but I didn’t have that option then. This was in the mid 90’s, keep in mind, when the internet was laughable compared with today’s standards.
Stuck in a small town, a fledgling internet, a tiny and dated public library, and no experts or masters on the subject (most people I knew that went backpacking or camping viewed it more as a passive, once-or-twice-a-year thing), I learned throughout high school and college mostly by experimentation, trial and error, and falling back on the tried and true methods I had learned as a child from my parents. I also began to expand my camping and nature library at home, reading many books on the subject or related to it when I could get my hands on them. After countless overnight and weekend adventures, I finally felt ready to take on bigger and better challenges by the time I was around 19-20 years old. I began to go on extended trips--from one night to one week--on parts of the Appalachian Trail. On the trail, I also got the chance to trade ideas with other nuts such as myself, and midway through college I felt I had really begin to bloom as a student of backpacking/the outdoors.
Below is a picture of me on the AT in PA around 2005.

Below is a picture of me on the AT in PA around 2005.

By the end of college I felt very comfortable in the woods, more comfortable there than anywhere else really, and able to handle most of what nature could throw at me if I had to. I also met the love of my life, a beautiful girl from Sweden, and soon after college we were married. She too shares my interest in camping, hiking, and nature, though not to the extent that I do--but in fairness to her, not many people are as crazy about the woods as I am. We went out on the Appalachian Trail together and had wonderful times, but life caught up to us, and soon we were both stuck behind a desk, working to save up so that we could move to Sweden. After moving to Sweden, I was again in my element with the forest all around me, but I also went through another dynamic evolution as an outdoors enthusiast. I continued to go out into the woods all the time and had wonderful experiences, but there were some things I took for granted, and other things I felt I had hit a glass ceiling in my learning. I craved to push myself further and continue to grow and learn, so I started to do more research on what was by the mid 2000’s a flourishing online community of backpackers, campers, and outdoor enthusiasts.
While much of what I discovered online I was already familiar with, I was pleasantly surprised to find a lot of new information on the details and nuances of the many skills and aspects involved in backpacking and the outdoors, some of which were really amazing. Out of everything I evaluated online, there were two schools of thought that added the greatest improvements to my own methods and techniques: ultralight (UL) backpacking, and bushcraft (BC). The philosophies behind both of them are pretty straight forward in theory, but in practice can be quite advanced and confusing to the novice. I am forced to use generalizations to illustrate my points, and as such it should be noted that these generalizations of course are not meant to accurately describe all UL and BC enthusiasts. And of course it should also be noted that many of the ideas presented in UL and BC are nothing new (especially BC), but have been rehashed or rediscovered by many outdoors people, myself included.
UL backpackers look to lighten the load of the gear they choose to bring with them as much as possible, and BC campers look to take as much advantage of natural resources around them as possible. UL campers generally rely on a lot of modern technology (e.g. silnylon tent, cuben fiber backpack, titanium pot, razor blade as a knife, etc.) and are influenced by a more eastern philosophical tenant of an attempt to reject the material in favor of living simply, i.e. "less is more." BC campers on the other hand, rely on older technology (e.g. canvas tent and backpack, steel pot, Bowie knife, etc.) and are influenced by a more western philosophical tenant of embracing materialism for comfort, i.e. freedom to choose whatever you want, weight be damned.
At best UL'ers resemble Zen monks with modern, fancy gear, and BC'ers more like cowboys or rangers of old with rugged, traditional gear. At worst, however, some UL purists harshly judge anyone that hauls even the smallest of luxuries out backpacking. On the other hand, some BC extremists will harshly judge anyone that questions their choices of gear or those that suggest alternatives, viewing even the slightest constructive criticism as an infringement on their freedom to take, say, over 50 pounds of gear with them--including four knives, an axe, a machete, a saw, and maybe even a gun or two! This can be very off-putting for a novice who is not in-the-know, and at times can be irritating to veterans looking to expand their horizons, like myself.
In addition to these examples of zealots, another element that is inherent with the internet (and indeed society in general) comes into play: posers. In all communities there are those that really have no good reason being a part of a given community, but do so for whatever ulterior motives. The same is true with both UL and BC, as there are pretenders in both communities. An urban yuppie might fancy themselves an ULer because they ordered lots of high-tech expensive UL gear online, only for the gear to collect dust in the closet, or perhaps used once a year on a weekend trip. Or a rural redneck might like to drop the word “bushcraft” around with their buddies while they are out hunting and/or fishing, claiming that all they would need to survive in the wild is a Rambo knife and maybe some paracord, of course never actually backing this bold claim up. But it sure sounds cool.
It would not be much of an issue if the posers just continued their façade on their own and kept it to themselves, but the problem is that many of them write blogs too, or make videos on Youtube, post on forums, etc. It can be difficult for a novice to be able to tell the difference between a veteran and a poser, for it is very easy to talk the proverbial talk, but another thing altogether to actually go out into the woods and not just survive, but be comfortable. As illuminating as my experiences have been with gathering information on the internet, it has also been just as frustrating at times dealing with people who honestly don’t know what the hell they are talking about.
By this point I hope my intentions are beginning to reveal themselves. It can be a real challenge to get good information on anything, let alone something with so many details and variations such as backpacking and/or camping. The purpose of this blog is to give the novice or would-be backpacker or outdoor enthusiast a good set of information to build on, and in a nutshell: create a blog that I wish I would have been able to read when I started my outdoor journey. This would have made my life much easier, and I would not have had to learn some things the hard way from my mistakes, failed experimentation, and trial and error. I could have reached the point that I am at now much sooner, with my current system and skills better than ever before, and I am enjoying and getting more out of the great outdoors now than I was in my youth.
In short, backpacking is probably my favorite way to spend my free time, and is more of a passion or lifestyle to me than just a hobby. I am always interested in continuing my growth and evolution as a student of the outdoors. I hope this blog will be helpful and enjoyable to read in your quest to get out and experience nature in ways in which many people in our fast-paced, alienated society are either unable or unwilling to do. The rewards are both concrete (e.g. getting in better shape, learning many useful techniques, improved critical thinking, etc.) and abstract (e.g. beauty, peace, wisdom, etc.) for those of us that can overcome the challenge of living in harmony with nature.
 |
| My wife and I at Machu Picchu in 2008. |
First post test
Testing, Testing...1, 2, 3...
So here I can have the space to sort out all my thoughts about camping, bushcraft, backpacking, hiking, the outdoors, and the many other things associated with that whole school of thought.
Just came back from my 9th overnight trip this year. I still hope I can reach my New Year's resolution goal of 30 nights out in the woods, but with another baby on the way... we'll see. It will be tricky.
That's all for my first post. More in depth articles on the subjects mentioned above to come in the future, plus pictures, maybe some interview from some experts.
Subscribe to:
Posts (Atom)